Pages

Showing posts with label Designer Cakes. Show all posts

Sunday, October 1, 2017

First Wedding Cake

An year old memories which I did not post due to my laziness or maseufiyat (a little bit of Urdu which I learnt watching serials).  

This was my first attempt to a wedding cake. Thanks Babu Uncle for giving me this chance to make is sons wedding cake  or I would have never thought of attempting it.  It was a task in itself, specially understanding the engineering of it. The cake was rum cake with lots or dry fruits.  The 3 tires where of 10", 8", 6" each.  The flowers were purple hydrangea. 


And before the final cake was made, there was a pre-run done, which was as below. 
This was finished by my kids and his friends and the church catechism children. 


Friday, October 31, 2014

Birthday Cake Design 3

I birthday cake which I had to make it overnight. Luckily I had some fondant already prepared in my refrigerator. It’s a 3 layered tricolored / triflavoured cake, with buttercream icing and sugar fondant covering.


Wednesday, October 29, 2014

VIBGYOR Birthday Cake (Rainbow cake)

It was my younger sons 5th Birthday and I had to make a special cake for him. As he has started going to school this year, he is learning the concept of colour and rainbow. So, thought of making a rainbow coloured cake with all the 7 colour i.e VIBGYOR.  Here is the final product with violet, indigo, blue, green, yellow, orange and red colours.

I have made half kg cake for each colour, which I think is a little big. So an advice would be to make a batter of 1 kg and divide it into 3portions.  You can also try this with Shades of colour.

So, enjoy baking and icing and do put in you feedbacks.


Ingredients
 
For 1kg Cake ( for 2 cakes)
 
Flour/maida - 250gm
Granulated sugar – 250gm
Butter – 250gm
Egg - 250gm (ie. 5eggs)
Baking powder - 1tsp
Vanilla essence - 1tsp
Colour – ½ tsp of each colours

For butter Cream

White butter – 2cup
Icing sugar – 8 cup
Vanilla essence – 2tsp
Milk – 2tbsp
Colour – ½ tsp of each colours

Method

For Cake

1.      Sever flour & baking powder together .
2.      Powder the granulated sugar .
3.      Preheat the oven to 1800c for 5 min.
4.      In a bowl beat the soft butter and sugar powder ( 1 min with a beater or 5/6 min with hand)
5.      To this add egg and beat. ( 2 min with beater or about 8 min by hand).
6.      Add essence and mix .
7.      Now fold in the flour.
8.      Divide this batter into 2 bowls.
9.      Add 2 different colours to both the bowls, mix well till the colour incorporated.  
10.  Grease and dust a 8” x 8” round container for each cake.
11.  Pour the mixture into it.
12.  Bake at 1800c for 30 min.
13.  Cool it completely.
14.  Repeat for all the 7 color of Rainbow.  

For Butter Cream

15.  Beat butter till it is soft.
16.  To this add 1 cup icing sugar at a time and keep beating till the entire quantity of sugar is mixed.  
17.  To this add vanilla essence mixed with milk and beat it till it is nicely incorporated.
18.  Divide the butter cream into 8 portion. Where in the 8th portion should be double the quality of the other portions.
19.  Don’t mix any color to the 8th portion as it will be required to do crumb coating.
20.  Add the 7 rainbow color to the remaining 7 portions and mix well.  

To assemble
 
21.  Level all the cakes horizontally.
22.  Now start with the Violet cake.  Place it on the cake board.
23.  Spread a thin layer of white butter cream on top.
24.  Next place the Indigo cake and spread the thin layer of white butter cream.
25.  Repeat this process with blue, green, yellow, orange, and red.
26.  Finally when the red cake is on the top. Check if all the cakes are leveled from the sides. If not, trim it and shape it.
27.  Now with the white icing make crumb coat i.e make an icing coat on the whole cake so that no crumbs of the cake is visible.  
28.  Now refrigerate for ½ an hour so that the icing gets stiff and become easy to do the color icing.
29.  Start icing from the bottom to top with 2 rings of each color.
30.  Further decorate it the way you want.
31.  Refrigerate it till you use.

Friday, September 12, 2014

Birthday Cake Design 2

HAPPY BIRTHDAY NIA


Nia my colleague daughter celebrated her 2nd Birthday yesterday.  She wanted a small cake for a celebration at home. This is what I made for her.  It’s a tricolored, tri-flavored cake with a vanilla flavored fondant icing.

Tuesday, May 27, 2014

Birthday Cake Design 1

Today is my elder son Rommel’s birthday.  Though we had the party for his friends 2 days back, today we wanted to make it a family affair.  So I prepared a grand dinner for him and a surprise cake with the left over cake crumbs, the trimmed portions etc. In a bottom movable cake tin, I have layered the crumbs and filled the whipping cream. Kept in the freezer for an hour and bushed it from the bottom to get a set cake. Them cover it with whipping cream and did some decoration.


Rest is all what you see.


Sunday, May 25, 2014

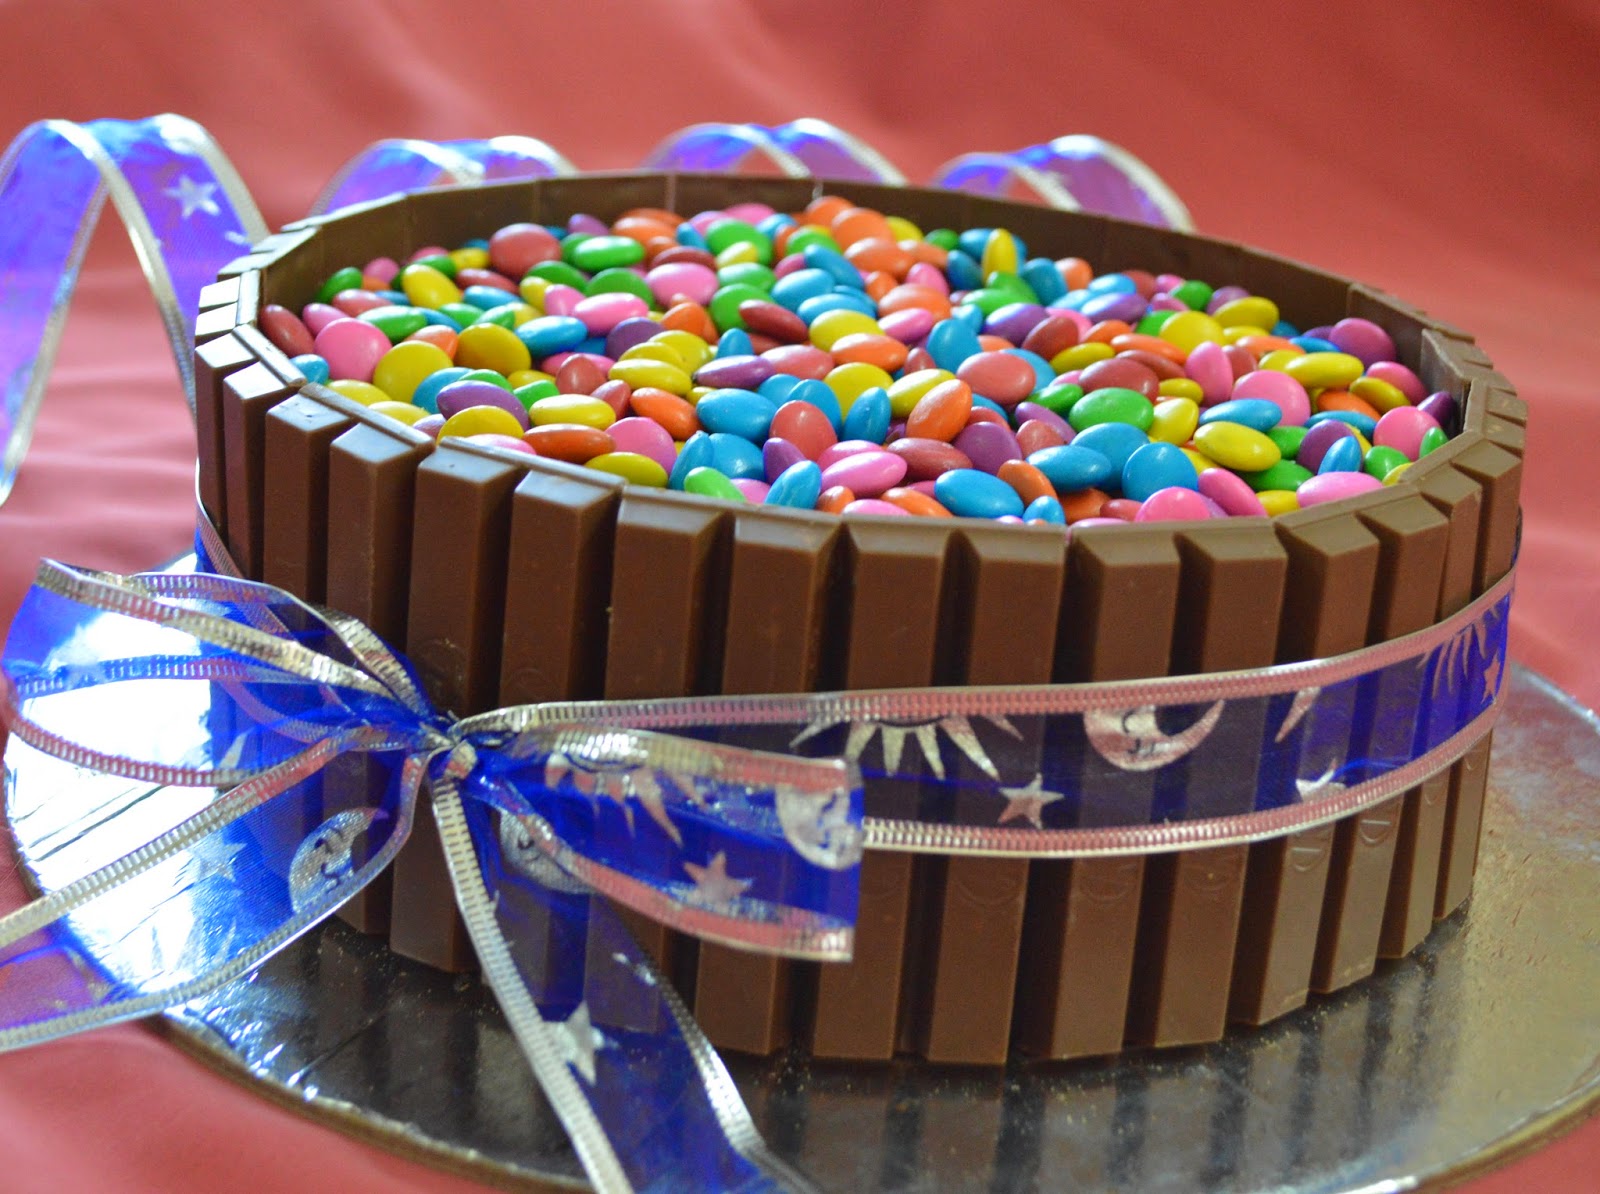
Kitkat Barrel Cake

It’s my son’s birthday on Tuesday.  He will be a 12 year boy with lots of demands, ideas and teenage attitudes. Four days ahead of his birthday on Saturday he come back after his morning play time and demanded for a birthday party the next day, as all his friends are going out of station for summer vacation from Monday. That was quite a short notice.


 I had to think about a cake that was quick and easy to decorate. So, went for a fast shopping to a nearby supermart, opted for Betty Crokers readymade cake mix which was readily available, brought some kitkats, amul cream, dark cooking chocolate and gems. Made the cake on Saturday evening, so that it cools down through the night. Sunday morning the first thing I did was made the ganache. The Ganache cooled in about half an hour.  Then, started assembling the cake and it just took about 15 to 20 min.


So, believe me making this cake is easy and fast.  And the end result is beautiful. Try it and you will be appreciated.

Ingredients

For the cake
Betty Croker devils food cake mix– 2 packets
Egg – 6
Oil – 160 gm
Water – 500 gm
9” cake pan - 2

For Chocolate Ganache
Dark cooking chocolate: 500gm (cut or grated into small pieces, so that it mixes well)
Cooking Cream – 300gm (i use amul)
Liquid Glucose – 2 tsp

For decoration
Kitkat – 18 packets of 2
Gems – 10 packets
Fancy ribbon to tie
  
Method

For the Cake ( as it is on the Betty Crocker cover)
1.      In a bowl put the cake mixture.
2.      Add egg, oil and water.
3.      With an electric beater mix all of them together for 5 min.
4.      Grease and dust with flour the cake pan.
5.      Pour half of the mixture in one and the rest to the other.
6.      In a preheated oven bake the cake for 40 min at 1800 or till the toothpick inserted in the center comes out clean.
7.      Cool it completely, atleast for 8 hrs.  

For chocolate Ganache
8.      Boil the cream in a sauce pan.
9.      When it starts boiling, switch of the heat.
10.  Add grated chocolate and liquid glucose. Mix well till there are no lumps.
11.  Cool and use. ( you can prepare this beforehand and can use it for other decoration)

To assemble the cake
12.  Trim both the cake from top.
13.   Cut both the cakes horizontally into equal half, so that you have 4 portions. (According to the height of the cake and the kitkat size you may use all the 4 part or less.  I have used only 3.  With the 4th part I will make a separate decoration)
14.  Place the first layer of cake on the board and apply the ganache, on top of it place the next layer properly aligned. Apply ganache and place the 3rd layer.
15.  Now cover the entire cake with ganache spreading it evenly. Don’t let it overspill.
16.  Clean up the board with a wet towel.
17.  Now place the Kitkat bars vertically on the sides of the cake, so that it covers the whole cake.
18.  Tie the outer side of the cake with a Ribbon so that the kitkats are intact.
19.  Fill the top of the cake with gems chocolate.
20.  You cake is ready – a kitkat barrel with colorful gems.
21.  Keep it in a refrigerator till it is served. 


Sunday, February 16, 2014

Birthday cum Valentine Cake ( Red velvet Cake with Cheese Cream Icing )


A cake which I made for my husband who celebrate his birthday a day before Valentine ’s Day. I baked a red velvet cake with cheese cream icing. The red velvet cake which I bake was not to my satisfaction so I am not putting the recipe for now.  But as the icing came out well I am just posting the photo’s.  But, I promise to try it again with some changes and the post the recipe.


Sunday, October 27, 2013

Bubble bee cup cake

With the beehive cake this was an addition so that all the kids get a bumble bee with the sunflower again the cupcake was chocolate cupcakes.


Bee Hive Birthday Cake

I was planning to make this cake for a long time and finally I made it on my little darling's  4th birthday.  The base was a chocolate cake with fondant icing. The design was inspired from cake book irresistible cakes by Sarah Maxwell and Angela Nilsen.   


Tuesday, October 22, 2013

Fondant Bumble Bee Stick

I am getting ready for my younger sons Birthday Cake. He is turning 4 this weekend. He is like a bee.  He can’t sit at a place for a long time, would be roaming around the whole day and quite noiseeeeeeeeeeeeeeeee. And above all super sweet tooth. So, I have thought of making a beehive cake. And this is the first step towards it, small bumble bee sticks.

The whole bee is edible except the sticker. The body is made of different color of fondant and the wing is made of cutout leftovers of church breads.  Hope all of you like it. Please approve.


Related Posts Plugin for WordPress, Blogger...